We wanted to share an awesome way our participants have shared their resources and wisdom with one another. The following post is an instructional on how Amy and her family start their seed each year for gardening.
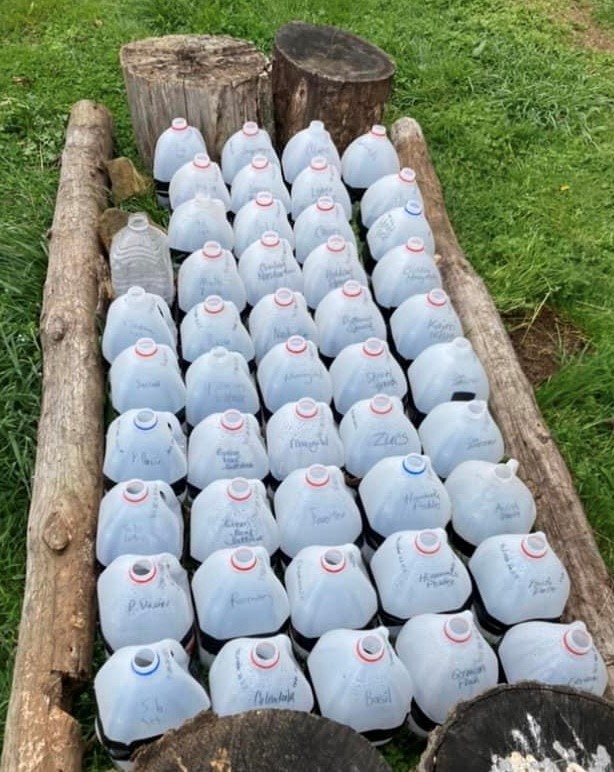
Seed Starting with Gallon Jugs
Growing plants from seed can be very intimidating to most. Some may be short on indoor space to use while others may lack the grow lights and seed tray set up or the cash flow to buy them. Even still, one can have the perfect set up and not have any success because of lack of knowledge or experience. If any of the above roadblocks apply to you, a possible solution to your seed starting dilemma may just be the jug method. This simple approach using repurposed one-gallon jugs takes away the need for a dedicated indoor space with the right set up while also taking much of the guess work out of getting plants from seed to garden.
What seeds can I start using this method?
Generally speaking, the jug method can work with just about any plant you’d like to grow. From fruits and veggies to herbs to cut flowers and ornamentals, this approach can be successful for those novice gardeners as well as life-long green thumbs. In cases where the seeds are quite small as in lettuces and many herbs, seeds starting in jugs makes germinating a breeze as it keeps seeds protected and moist. These seeds can be sprinkled over the soil to sow. Plants with larger seeds like squash and melons can be sown in groups of 3 or 4 per jug and separated when transplanted to the garden. Keep in mind, however, that root veggies like carrots and radishes as well as beans and peas are best sown in place where they will remain through harvest.
How do I get started?
You’ll need:
-seeds (best germination rate if purchased packets are dated for the current season or if seeds were saved from plants the previous season)
-1-gallon jugs WITHOUT lids (translucent jugs are preferred over completely clear)
-duct tape
-cutting tool (box cutter or pocketknife works best)
-soil ideal for seed starting
-wood burning pen or drill to create drain holes in the jugs
-grease pencil to label each jug
When it comes to planning when to start seeds in jugs, considerations must be made regarding USDA plant hardiness zones. There’s no exact science to choosing when to start, but a safe timeframe is around 4-6 weeks from the last projected frost date for the zone. Because of this, there may be instances when the jugs need to be covered with a heavy blanket over night if low temperatures or frosts are forecasted and seeds have already germinated.
Step 1-Use the wood burning tool or drill to create 5-6 drain holes in the bottom as well as 1-2 holes about 2” from the bottom on the side of each jug.
Step 2-Cut jugs roughly in half around their circumference starting at one side of the handle and ending on the other side, leaving the handle and just below it attached.
Step 3-Add 4” of soil to each jugs and saturate with water.
Step 4-Sow seeds – Do not follow directions on seed packets; for small seeds, sow on the surface and sprinkle a tiny bit of soil to just barely cover the seeds and for larger seeds, gently push seeds into soil just below the surface, making sure they’re covered.
Step 5-Use duct tape to seal up each jug.
Step 6-Place jugs together in a location that will get direct sun at least part of the day and is exposed to rain.
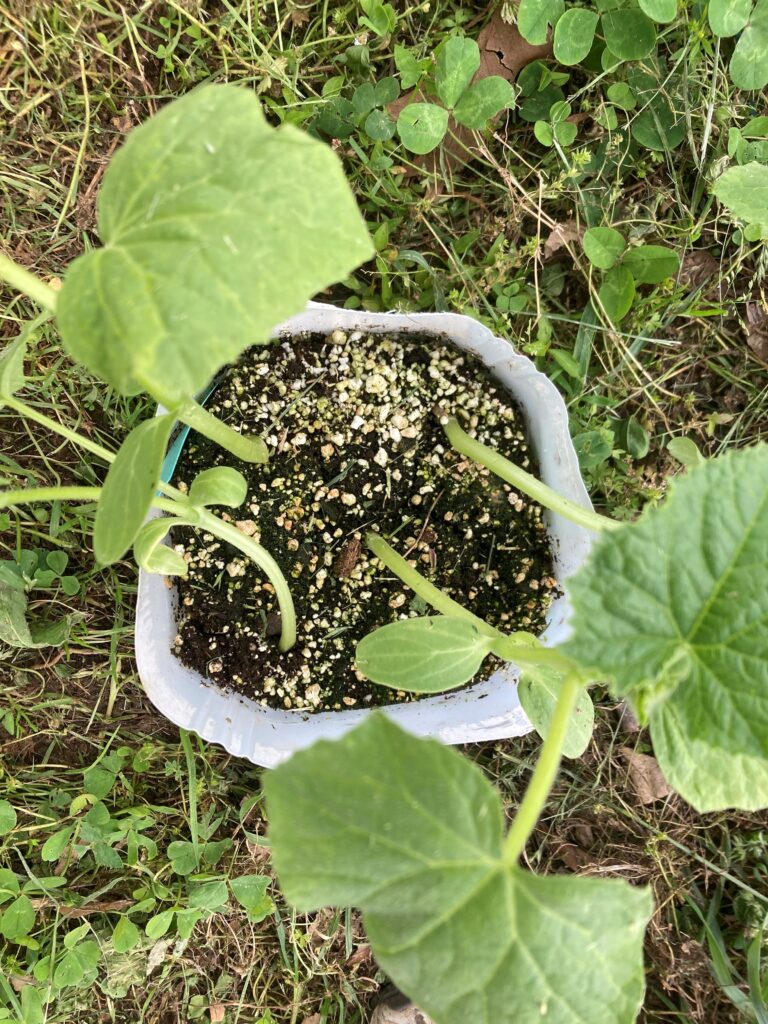
Once in place, the jugs will only need watered when condensation isn’t present on the inside. When needed, they can be watered using a garden hose with the “shower” setting on the nozzle or with a watering can. Until plants are established, take care to not flood the jugs with too much water. Once the seeds germinate and plants have developed several sets of true leaves, the duct tape can be removed to vent the jugs; the tops should still be in place. After allowing the plants to acclimate for a few days, begin folding back the tops of the jugs for portions of the day, working up to leaving the tops off for good. At this point, most of the plants will be ready to be transplanted to the garden. It’s feasible to plant the entire chunk of soil and seedlings together for some plants like lettuce, while other seedlings like squash will need to be separated before planting.
To have a garden is to learn and grow right alongside those plants held dear. Perhaps this particular seed starting technique will allow new as well as seasoned gardeners to have greater success with less headaches as they begin their gardens each year. Happy gardening!
Amy Ferguson
Leave A Comment