I don’t know about you, but our garden is producing A LOT of green beans right now. Good things come to those that wait, and we have picked 5 pecks already and more to come! We’re still patiently waiting on our tomatoes to turn red, but at least we plenty of beans to eat in the meantime.
Last year we canned green beans, but this year wanted to try something new (and quicker) since we have a 4 month old in the house. Maybe we’ll still have beans left over when he’s able to start eating ‘real’ food- i’m going to look into green bean puree recipes when that time comes.
For now, we had to find a way to save ALL of those green beans! After learning about blanching and freezing the beans I got really excited because it super easy and quick. So how do you blanch green beans?
Blanching is a culinary technique that includes rapidly chilling vegetables in a big amount of ice cold water (60 degrees Fahrenheit or below) to stop the cooking process. This prevents enzyme activity that can lead to a loss of flavor, color, or texture, guaranteeing that your green beans stay fresh even after being frozen! Here are 4 easy steps to follow:
- Remove the ends of the green beans and wash them. Trim the stem ends of the green beans, as well as the tail ends, if desired, after gently rinsing them in cool water. If your green bean variety has a stringy fiber that runs throughout the bean pod, clip it off as well.
- Cut the green beans into tiny pieces (optional). Cut your green beans into the size bits you desire — normally one to two inches — however this step is optional and depends on the recipe you’ll be using them in later.
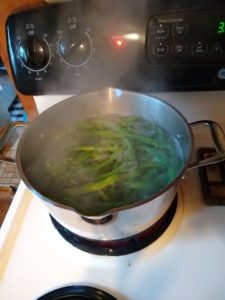
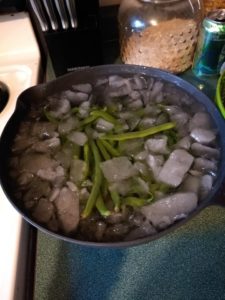
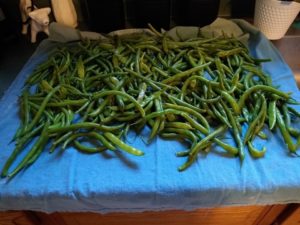
- Blanch the green beans- A large pot of water should be brought to a boil. Fill a big bowl with ice water while you wait. Once the water is boiling, add a generous amount of salt (about a tablespoon) per gallon of water. Working in batches, add green beans to boiling water and cook until just tender, 2 to 4 minutes depending on the size of beans. Then transfer beans to ice water (this will immediately stop cooking and preserve their bright green color). Let them soak about 4 minutes, then using tongs, transfer to a towel to drain and dry. Repeat with remaining beans, adding more water to the pot to boil and more ice to the bowl as needed.
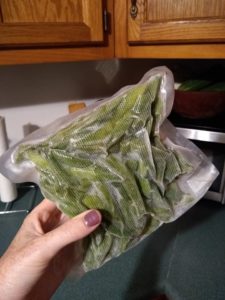
- Freezing the beans- Place the beans on a baking sheet in a single layer and freeze until solid. After that, place the contents in resealable bags, containers, or jars (freezing first ensures that the beans wont all freeze together in a huge clump). Make sure the beans are packed in snugly, then press out as much air as possible before sealing the bag or container; for organizational purposes, you may wish to mark each bag or container with dates and amounts. They should be good in the freezer for up to 8 months!
What type of garden goodies have you been preserving this season?
Leave A Comment