 Everything you wanted to know about CFI’s water bath canning workshop, as told by a beginner.
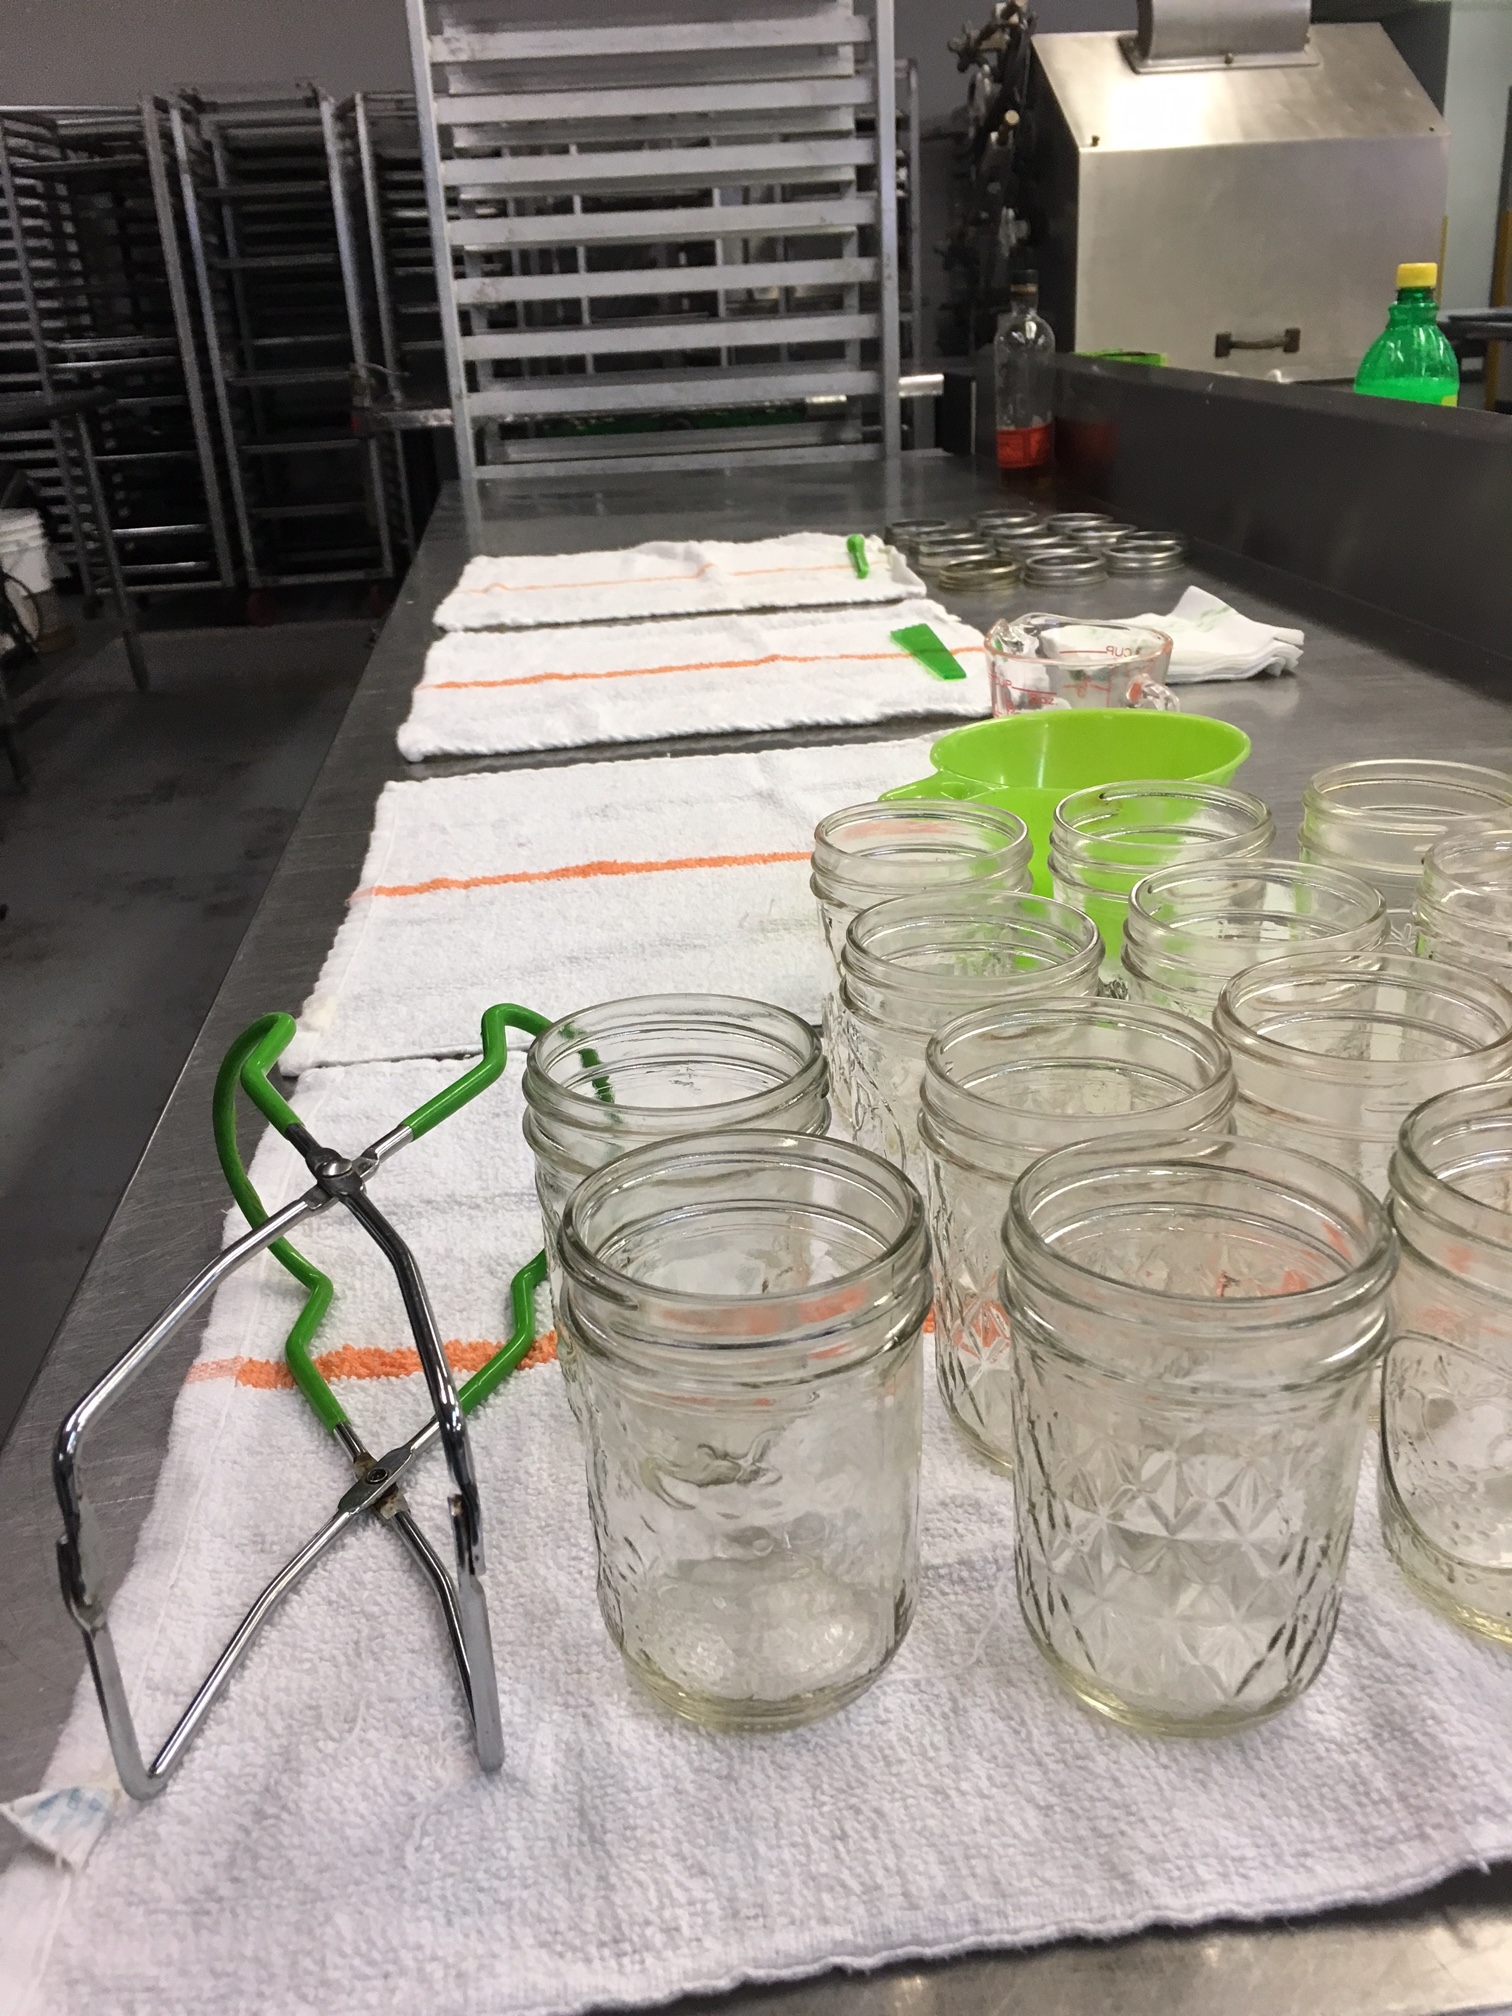
So, I have to admit I have never canned before. Nothing. Ever. So, I was pretty excited to experience CFI’s canning workshop on a Thursday evening in July. CFI’s Executive Director, Mary, led the workshop from ACEnet’s kitchen, which was cleaned spotless and set up with all of the canning essentials.
Mary grew up canning with her family in Meigs County, and instilled with me two important takeaways about canning: First, I have always been intimidated by canning—Mary taught us that canning really does not have to be that hard. We are capable. All of the fears we confessed about canning (i.e., mostly botulism) can be easily avoided through being clean and careful.
Second, canning “isn’t a stir fry,” as Mary explained. It is more like baking a cake. For a friend’s wedding. This means:
Everything (your kitchen surfaces, cooking implements, etc.) should be clean and sanitized. Also put your hair up.
Use the best ingredients—the local stuff at peak freshness. Nutritional content and flavor quality will be reduced if you don’t.
Use a recipe and *follow* it. This is where the baking metaphor comes in. Always use a USDA approved recipe (in any published cookbook) and follow it to a tee. This means no additions, substitutions, guesstimating measurements, or getting exploratory with your ingredients. Don’t use old school methods. Also, be sure to adhere strictly to the cooking and processing times. “Don’t play with father time,” as Mary said. As long as you follow these instructions, you’ll do great!
Start with jars in really good condition (check for cracks, dents, fizzers in jar), and only use lids one time (the rubber degrades). You can reuse the bands.
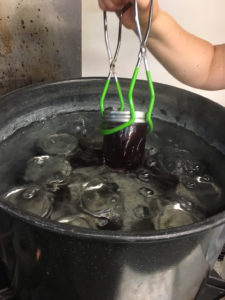
Now for the canning part. Water bath canning is best for high acid foods like most fruits, tomatoes, or pickling. Mary had a pot of blueberry jam bubbling on the stove. She also had a small pot for sanitizing lids and a large pot for the jars. Canning pots have a barrier in between the flame and the bottom of the jars so that the jars don’t get too hot and crack. We put the cans and lids in their separate pots in cold water and brought them to a rolling boil for 15 minutes.
When the jars were ready, we added the jam to them, wiped them clean, and used a magnet canning tool to pull the sanitized lids out of the hot water bath. I screwed the band over the lid and we put the filled jars back in boiling water for the amount of time specified on our recipe. Canning, as Mary stated, is actually very easy. And more importantly, we sampled the blueberry bourbon jam and it tasted amazing!
After you canning your food, you should let it rest for 24 hours. As the rubber gasket makes a vacuum seal, you should hear a “pop.” After 24 hours you can take the rings off. At this point, it should be hard to get the lids off. You should be able to hold something by the lid and without it budging.
Last canning tips:
You can borrow water bath canning supplies from CFI.
If your food appears to have gone bad, let it go! It’s not worth the risk. Signs of good food gone bad are that it tastes, looks, or smells unpleasant.
Sanitize a couple of extra jars (more than you think you’ll need) in case you come across one that’s chipped or dented as you start the canning process.
Canning can take some time, so dedicate a day to it. Mary advices that you “Find a friend with a big kitchen and air conditioning. Can together and share the bounty.”
-Sonia Ivancic
Leave A Comment